aws인스턴스 2개생성
우분투 20.04 , t2.2x라지
eval "$(ssh-agent -s)" ssh-add <키 이름>.pem
쿠붕이 설치
# [kube-control1]
git clone -b v2.21.0 https://github.com/kubernetes-sigs/kubespray


sudo apt-get update
sudo apt-get install python3 python3-pip -y

cd kubespray
sudo pip3 install -r requirements.txt # pip -r 옵션 : 텍스트파일의 패키지 설치

# inventory 디렉토리 복사
cp -rfp inventory/sample inventory/mycluster
vim inventory/mycluster/inventory.ini
# [inventory.ini] 기존 내용 삭제, 아래 내용으로 수정
[all]
kube-control1   ansible_host=10.0.7.242      ip=10.0.7.242        ansible_connection=local
kube-node1      ansible_host=10.0.143.129    ip=10.0.143.129

[all:vars]
ansible_python_interpreter=/usr/bin/python3

[kube_control_plane]
kube-control1

[etcd]
kube-control1

[kube_node]
kube-node1

[calico_rr]

[k8s_cluster:children]
kube_control_plane
kube_node
calico_rr

아래처럼 수정
vim inventory/mycluster/group_vars/k8s_cluster/addons.yml
# [addons.yml]
16 metrics_server_enabled: true
...
100 ingress_nginx_enabled: true
...
165 metallb_enabled: true
...
167 metallb_ip_range:
168   - "192.168.56.200-192.168.56.210"
...
195 metallb_protocol: "layer2"
vim inventory/mycluster/group_vars/k8s_cluster/k8s-cluster.yml
# [k8s-cluster.yml]
129 kube_proxy_strict_arp: true
# ansible
# 모든 가상머신이 서로 통신하는지 확인
ansible all -i inventory/mycluster/inventory.ini -m ping
# 출력값
kube-control1 | SUCCESS => {
    "changed": false,
    "ping": "pong"      # 모든 가상머신에 대해 ping, pong 확인
}
...

# 모든 가상머신에서 apt update 실행
ansible all -i inventory/mycluster/inventory.ini -m apt -a "update_cache=yes" --become
# 출력값
kube-control1 | CHANGED => {
    "cache_update_time": 1688092019,
    "cache_updated": true,     # 모든 가상 머신에 대해 true가 출력되는지 확인
    "changed": true     # 모든 가상 머신에 대해 true가 출력되는지 확인
}
...

# 설치하기
ansible-playbook -i inventory/mycluster/inventory.ini cluster.yml --become
# 설치 오래걸림
kubeflow 설치
https://github.com/kubeflow/manifests
GitHub - kubeflow/manifests: A repository for Kustomize manifests
A repository for Kustomize manifests. Contribute to kubeflow/manifests development by creating an account on GitHub.
github.com
https://github.com/opendatahub-io/manifests
GitHub - opendatahub-io/manifests: A repository for Kustomize manifests
A repository for Kustomize manifests. Contribute to opendatahub-io/manifests development by creating an account on GitHub.
github.com
1. 사전 필요 패키지 설치 (default 스토리지 클래스, kustomize)
nfs 서버 설치 및 default 스토리지 클래스 정의 (control plane)
sudo apt install -y nfs-kernel-server
sudo mkdir /srv/nfs-volume
echo "/srv/nfs-volume *(rw,insecure,sync,no_subtree_check,no_root_squash)" | sudo tee /etc/exports
## 출력값 -> /srv/nfs-volume *(rw,sync,no_subtree_check,no_root_squash)
sudo systemctl restart nfs-kernel-server.service
worker 노드에 설치
sudo apt install -y nfs-common동적 nfs 프로비저너 설치
cd ~
git clone https://github.com/kubernetes-sigs/nfs-subdir-external-provisioner
cd ~/nfs-subdir-external-provisioner/deploy/

# deployment.yaml
...
      containers:
        ...
          env:
            - name: PROVISIONER_NAME
              value: k8s-sigs.io/nfs-subdir-external-provisioner
            - name: NFS_SERVER
              value: 192.168.56.11  # nfs서버 주소
            - name: NFS_PATH
              value: /srv/nfs-volume  # 마운팅할 경로
      volumes:
        - name: nfs-client-root
          nfs:
            server: 192.168.56.11  # nfs서버 주소
            path: /srv/nfs-volume  # 마운팅할 경로


kubectl create -k

# default 스토리지 클래스 설정
$ kubectl patch storageclasses.storage.k8s.io nfs-client -p '{"metadata": {"annotations":{"storageclass.kubernetes.io/is-default-class":"true"}}}'
# default 스토리지 클래스 설정 확인
$ kubectl get sc
2. kustomize 최신버전 설치
$ curl -s "https://raw.githubusercontent.com/\
kubernetes-sigs/kustomize/master/hack/install_kustomize.sh"  | bash
$ sudo mv kustomize /usr/local/bin
$ kustomize version
v5.1.1
cd manifests
while ! kustomize build example | kubectl apply -f -; do echo "Retrying to apply resources"; sleep 10; done
kubectl edit svc -n istio-system istio-ingressgateway
- istio-system 네임스페이스의 서비스 istio-ingressgateway 의 타입을 NodePort로 변경
- 내부 포트번호 추가 31380
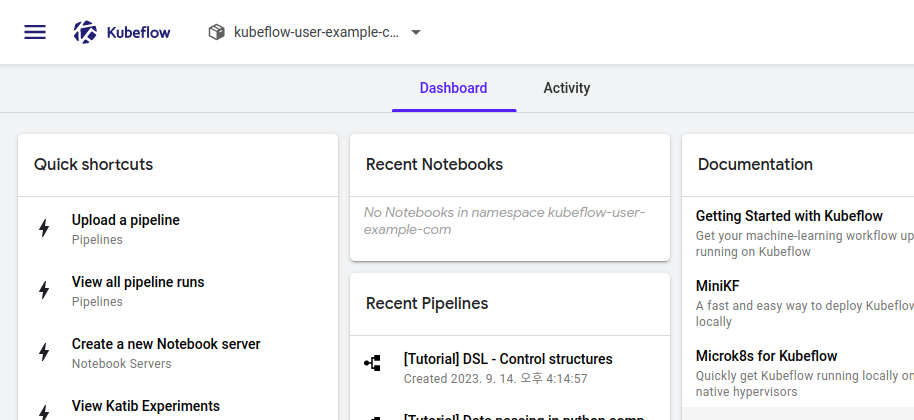
- 외부ip + 포트번호로 kubeflow 대시보드 접속 확인하기

http://외부ip:31380 접속
user@example.com // 12341234 >>> 로그인
컨트롤 노드에서도 파드 스케줄링 되게 하는 설정 (taint 삭제)
kubectl taint nodes control node-role.kubernetes.io/control-plane=:NoSchedule-
kubectl taint nodes control node-role.kubernetes.io/master=:NoSchedule-
kubectl describe nodes control
kubeflow 네임스페이스 생성 : sy
# 디렉토리 복사
$ cp -r ~/manifests/common/user-namespace ~/manifests/common/sy-namespace

# ~/manifests/common/sy-namespace/base/vim params.env
user=user@example.com
profile-name=sy

# 실행 (manifests 디렉토리에서)
$ kustomize build common/sy-namespace/base | kubectl apply -f -
노트북 생성할 때 CSRF 에러 발생 시
~/manifests/apps/jupyter/jupyter-web-app/upstream/base/params.env


JWA_UI=default
JWA_PREFIX=/jupyter
JWA_CLUSTER_DOMAIN=cluster.local
JWA_USERID_HEADER=kubeflow-userid
JWA_USERID_PREFIX=
JWA_APP_SECURE_COOKIES=false # 이 부분 변경
변경된 사항만 적용해줌 (manifests 디렉토리에서 실행)
while ! kustomize build example | kubectl apply -f -; do echo "Retrying to apply resources"; sleep 10; done
도커 레지스트리 설치
kubeflow-registry-deploy.yaml
apiVersion: apps/v1
kind: Deployment
metadata:
  annotations:
    deployment.kubernetes.io/revision: "1"
  generation: 1
  labels:
    run: kubeflow-registry
  name: kubeflow-registry
  namespace: default
spec:
  progressDeadlineSeconds: 600
  replicas: 1
  revisionHistoryLimit: 10
  selector:
    matchLabels:
      run: kubeflow-registry
  strategy:
    rollingUpdate:
      maxSurge: 25%
      maxUnavailable: 25%
    type: RollingUpdate
  template:
    metadata:
      creationTimestamp: null
      labels:
        run: kubeflow-registry
    spec:
      containers:
      - image: registry:2
        imagePullPolicy: IfNotPresent
        name: kubeflow-registry
        resources: {}
        terminationMessagePath: /dev/termination-log
        terminationMessagePolicy: File
      dnsPolicy: ClusterFirst
      restartPolicy: Always
      schedulerName: default-scheduler
      securityContext: {}
      terminationGracePeriodSeconds: 30
kubeflow-registry-svc.yaml
apiVersion: v1
kind: Service
metadata:
  labels:
    run: kubeflow-registry
  name: kubeflow-registry
  namespace: default
spec:
  ports:
  - name: registry
    port: 30000
    protocol: TCP
    targetPort: 5000
    nodePort: 30000
  selector:
    run: kubeflow-registry
  sessionAffinity: None
  type: NodePort
status:
  loadBalancer: {}
kubectl apply -f kubeflow-registry-deploy.yaml
kubectl apply -f kubeflow-registry-svc.yaml
마스터, 워커 공통 영역
kubeflow-registry.default.svc.cluster.local 해당 주소는 쿠버네티스만 아는 주소이기 때문에 호스트에서는 인식할 수 있게 /etc/hosts에 입력을 해주어야 함
$ vim /etc/hosts
…
마스터노드IP kubeflow-registry.default.svc.cluster.local
워커 노드에서
curl 명령어를 이용하여 도커 레지스트리에 등록된 이미지 목록 확인
curl kubeflow-registry.default.svc.cluster.local:30000/v2/_catalog
레지스트리에 이미지가 계속 저장되야하므로 pvc생성해주고 디플로이먼트로 실행해주자
apiVersion: v1
kind: PersistentVolumeClaim
metadata:
        name: rigimg-pvc
spec:
        accessModes:
                - ReadWriteMany
        resources:
                requests:
                        storage: 50Gi
레지스트리 디플로이 야물파일
apiVersion: apps/v1
kind: Deployment
metadata:
  annotations:
    deployment.kubernetes.io/revision: "1"
  generation: 1
  labels:
    run: kubeflow-registry
  name: kubeflow-registry
  namespace: default
spec:
  progressDeadlineSeconds: 600
  replicas: 1
  revisionHistoryLimit: 10
  selector:
    matchLabels:
      run: kubeflow-registry
  strategy:
    rollingUpdate:
      maxSurge: 25%
      maxUnavailable: 25%
    type: RollingUpdate
  template:
    metadata:
      creationTimestamp: null
      labels:
        run: kubeflow-registry
    spec:
      containers:
      - image: registry:2
        imagePullPolicy: IfNotPresent
        name: kubeflow-registry
        resources: {}
        terminationMessagePath: /dev/termination-log
        terminationMessagePolicy: File
        volumeMounts:  # 오타 수정
        - name: rigimg-volume
          mountPath: /var/lib/registry
      dnsPolicy: ClusterFirst
      restartPolicy: Always
      schedulerName: default-scheduler
      securityContext: {}
      terminationGracePeriodSeconds: 30
      volumes:
      - name: rigimg-volume
        persistentVolumeClaim:
          claimName: rigimg-pvc
그다음 도커 설치
sudo apt install docker.io
sudo systemctl start docker
sudo systemctl enable docker
sudo usermod -aG docker $USER
$ sudo vim /etc/docker/daemon.json
{
"exec-opts": ["native.cgroupdriver=systemd"],
"log-driver": "json-file",
"log-opts": {
"max-size": "100m"
},
"data-root": "/mnt/sharedfolder",
"storage-driver": "overlay2",
"default-runtime" : "nvidia",
"runtimes" : {
"nvidia" : {
"path": "/usr/bin/nvidia-container-runtime",
"runtimeArgs" : []
}
},
"insecure-registries": [
"kubeflow-registry.default.svc.cluster.local:30000"
]
}
마스터 / 워커 공통 영역
$ sudo systemctl daemon-reload
$ sudo systemctl restart docker
kubectl edit svc -n istio-system istio-ingressgateway >>> 초기화 되었기에 31380다시 설정
'쿠버네티스,쿠버플로우' 카테고리의 다른 글
| 던파 쿠버플로우, 쿠버네티스(2) (0) | 2023.09.15 |
|---|---|
| 던파 쿠버플로우, 쿠버네티스 (0) | 2023.09.15 |
| 던전앤파이터 시세 예측[7] (1) | 2023.09.14 |
| 던전앤파이터 시세 예측[6] (1) | 2023.09.12 |
| 던전앤파이터 시세 예측[장고(쿠버네티스 올리기)] (0) | 2023.09.10 |


